For the next few weeks we’re going to look at simple things you can do to improve your photos, while also hopefully sparking some creativity in the process.
Photography is a constant journey of learning, practicing and improving, and no matter how long you’ve been shooting it never hurts to revisit the basics.
For our first back-to-basics issue I’ve asked my friend, nature and adventure photographer Sarah Ehlen, to brush us up with her beautiful photos. Take it away, Sarah!
Back to Basics Issue #1: Rule of Thirds
By Sarah Ehlen in Missoula, Montana
Have you noticed how it’s easy to get stuck in a creative rut and start photographing everything the same way all the time?
Let’s mix things up a bit!
Start by taking a look at this photo, from Glacier National Park:

Not bad, but the composition is a bit boring. Here’s a small change…

See how simply moving the boat off-center creates a much more interesting composition?
To do this, imagine a tick-tack-toe board across your image, dividing the frame into thirds. Placing your horizon or subject along one of those thirds lines will usually make your photo feel way more dynamic.

In the photo above, the horizon line between water and land is placed along the upper thirds line.
Here’s another example:

Notice how the horizon line runs across the center of the frame in the photo above. Let’s see what happens if it’s moved to the bottom third:
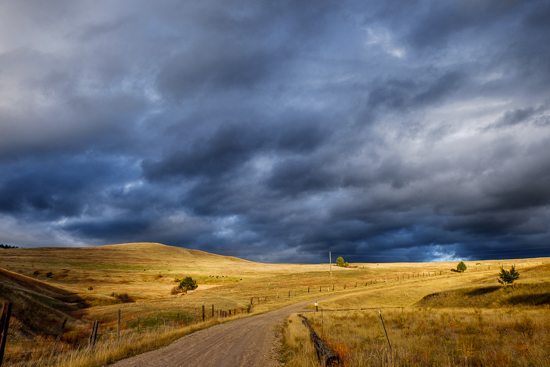
Now the expansiveness of the sky is emphasized by simply placing the horizon a little lower in the scene, along a thirds line.
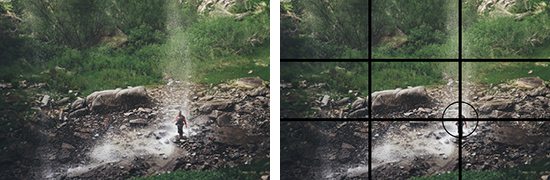
You can take it even further by positioning your subject on a “power point” — anywhere two lines intersect on your imaginary tick-tack-toe grid.
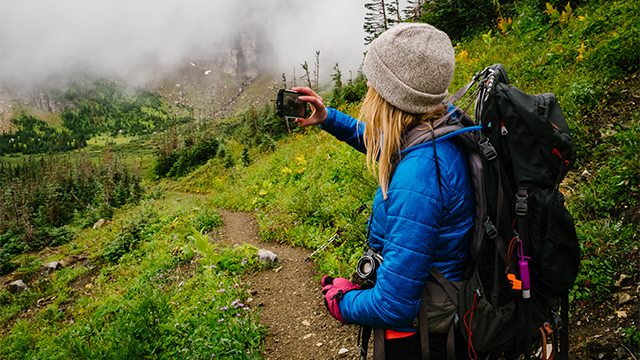
Here, the person is composed on a power point — one of the most visually interesting spots to place the subject within your frame.
Something else to keep in mind is the idea of implied motion. What I mean by this is that if your subject is facing a particular direction, it’s a good idea to leave some room on that side of the image to create a sense of balance.
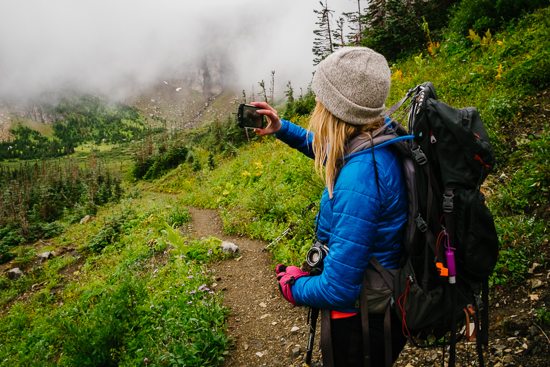
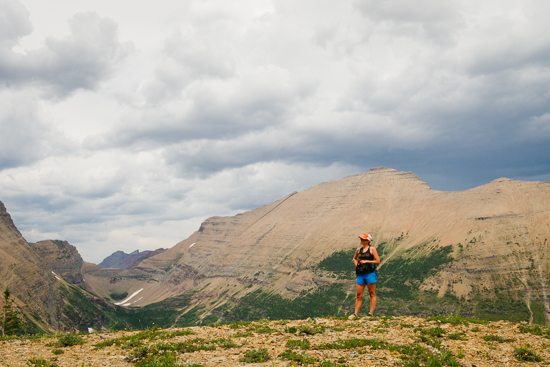
Leaving more space on the left side in the examples above leads the viewer’s eye in the direction the subject is looking, while also moving the subject out of the center of the frame.
The Rule of Thirds is talked about a lot in photography for good reason — it really helps make a composition more interesting.
So give it a try for yourself — move your subject (or horizon) off-center to one of the thirds lines and see what it does for your image!
Travel Photography Resources
5 Dos and 2 Don’ts for Travel Photography
Take Great Photos And Get Paid More For Your Travel Articles
Turning a Photography Hobby into a Monthly Income
The Pros Of Selling Your Images As Stock Photography
16 Mobile Photography Tips And Tricks Every Photographer Should Know
