Every image needs some processing before you can sell it as stock. Think of it like taking photos with film. When you shoot film, it doesn’t come out of the camera as a finished print. What you have is the negative, which needs to be processed. Digital files straight out of your camera are like digital negatives. To give them pop and make them ready for stock sites, they still need to be processed. Here are a few basic Adobe Lightroom maneuvers you can use to quickly and simply process your photos to sell them as stock… Note: If you don’t know how to import your photos into Adobe Lightroom, you’ll find more details about that here: http://tinyurl.com/6n6bka With your photos in Lightroom, in the “Develop” mode, start at the top of the editing options and work your way down. QUICK FIX #1: Look at the histogram. (30 seconds) When you get used to working with it, the histogram can tell you a lot about an image right off the bat. But, for now, you basically want to take a look and see where the exposure lies in the image. If your image is over- or under-exposed, the colors inside the histogram will be “clipped” on either end, looking as though they extend beyond either side. “Clipped” means that there are areas of total black or total white. If that’s the case, stock sites won’t take your image. You can see exactly where there is too much white or black by hovering your mouse over the little triangle at the top left (black) or the top right (white). When you do this, any areas that are totally black will show up as blue, while any areas that are totally white will show up as red on your screen. Here you can also see whether you need to increase your light and/or dark areas. Each histogram, generally speaking, should be stretched from side to side without too much clipping, like this one: 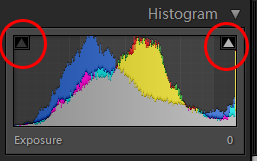 As you start to make adjustments to your photo, you can refer back to the histogram to see how the exposure has changed and whether or not it needs further tweaking. QUICK FIX #2: Adjust the tone. (45 seconds) Next, move on down to the tone section, shown below, where you can make slight adjustments to the exposure of your photo, use the Recovery slider, bump up the fill light, darken the blacks, and/or play with brightness and contrast.
 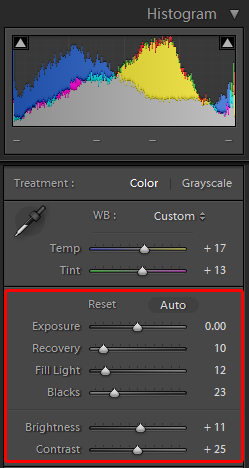 Recovery works with the highlight areas and can bring back spots that are blown out or appear too bright. (You’ll see the result on your histogram.) Fill Light adds a little more brightness to the mid-tone areas and the Blacks slider will darken your dark areas, sometimes giving your image a little more definition. Usually a bump in brightness and contrast is nice, also. ** TIP: With all sliders, gentle, easy adjustments are recommended when it comes to processing your images for stock. Too much fiddling and you risk introducing other issues. QUICK FIX #3: Adjust your Tone Curve. (25 seconds) At this point, I would recommend skipping the next little section and moving on down to the “Tone Curve.” It’s another tool for giving your image more pop and I use it with EVERY image I process. Slightly bump up the lights and down the darks by grabbing the parts of the line that I circled below — dragging the upper part up a little more and the lower part down. This stretches out the contrast a bit more and helps eliminate any flat dullness to the overall image.
  Again, notice how the histogram is changing. QUICK FIX #4: Remove the sharpening. (10 seconds) The “Noise Reduction” and “Sharpening” area, while sometimes useful for print, is a section that should always be left at zero for stock. Lightroom defaults for sharpening though, so you will have to go in and manually slide it to zero. Here’s an example of a photo from this month’s challenge, before quick fixes 1-4 and after:
  See how there’s a little haze in front of the “air guitar” playing monkey? Now look at it after the quick fixes:
  In this second version, the colors are brighter and the haze is mostly gone. QUICK FIX #5: Rotate and crop. (70 seconds) If you want to sell your image for stock, it needs to have a straight horizon line, which is easy to do in Lightroom. Under your photo, you’ll see these tools:
  Click on the crop tool circled here. Then, when you click around your photo, you’ll see a grid over the image. To straighten your horizon, click on the little slider over to the right and move it around. You will see your image adjusting. You can achieve the same thing by placing your cursor near the corner of your image. When it changes into a little arrow arch, click and drag it and you can turn the image.
 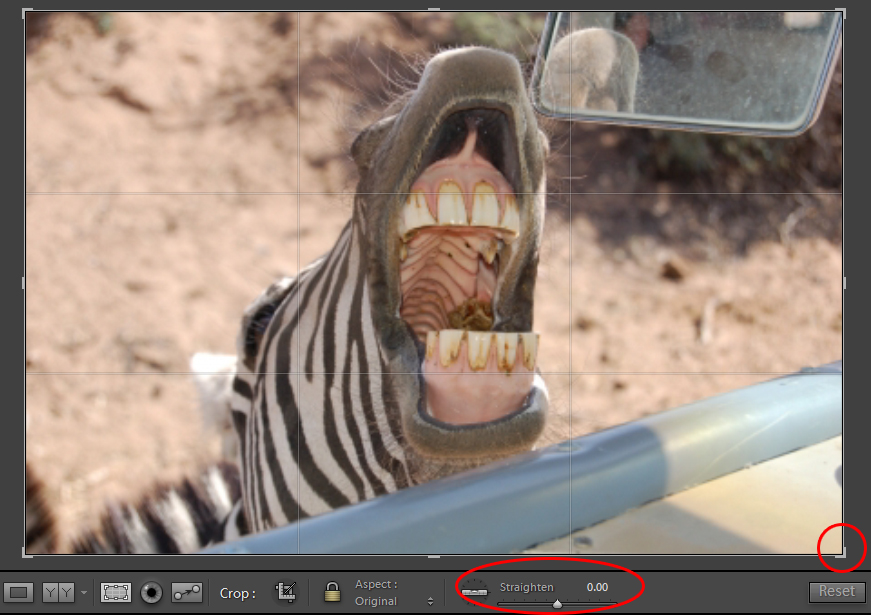 If you want to crop your image, go to the area that says crop, click on the tool and you can draw a box over the image. Make adjustments by dragging on the edge of the crop frame. With the hand, you can move the image around for an exact fit. But what if you want something other then the original size? Say, for instance, you want a square image. Go to the “aspect” area and click on the drop-down list. There you will see a list of dimension options. For a square, click 1×1. When you do that, the only thing your crop tool will draw out is an exact square, like this:
 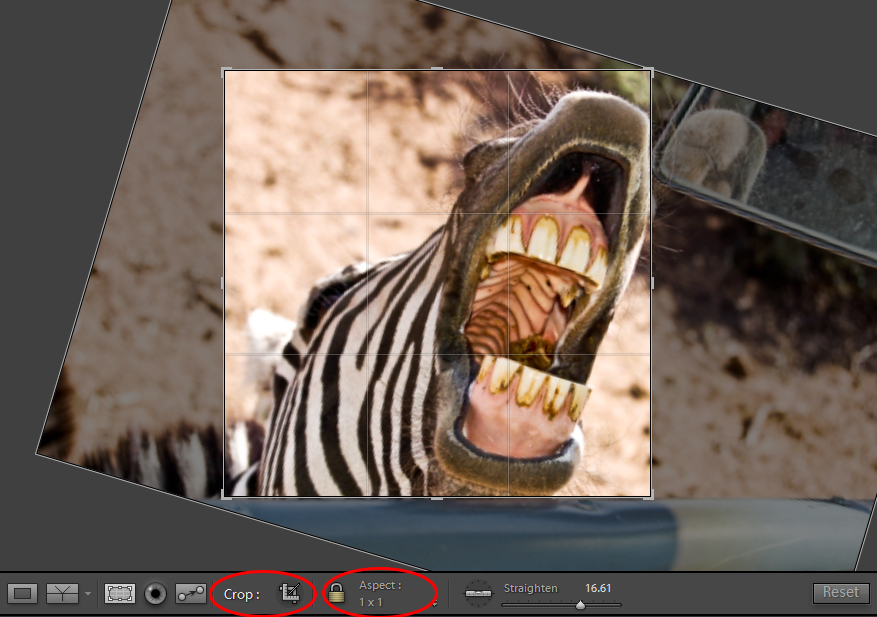 You’ll want to give yourself plenty of time to get used to all of the tools, of course. But once you’ve got it down, you can apply these basic changes to every photo you plan to sell as stock in about three minutes. Your time may vary according to how much you want to change the photo and play around with it. As you get more comfortable with Lightroom, you can get deeper into the more detailed changes. More about those in another issue. For now, play around all you want in Lightroom. Remember, no matter how many changes you make to an image, you can always go back to the original. [Editor’s Note: Learn more about how you can turn your pictures into cash in our free online newsletter The Right Way to Travel. Sign up here today and we’ll send you a new report, Selling Photos for Cash: A Quick-Start Guide, completely FREE.]
Travel Photography Resources
5 Dos and 2 Don’ts for Travel Photography
Take Great Photos And Get Paid More For Your Travel Articles
Turning a Photography Hobby into a Monthly Income
The Pros Of Selling Your Images As Stock Photography
16 Mobile Photography Tips And Tricks Every Photographer Should Know
