Just recently, I bought the mirrorless Fuji XT2, also, and I really appreciate its lightweight technology. I can see myself traveling with this more than my Nikon just to save space in my bag.
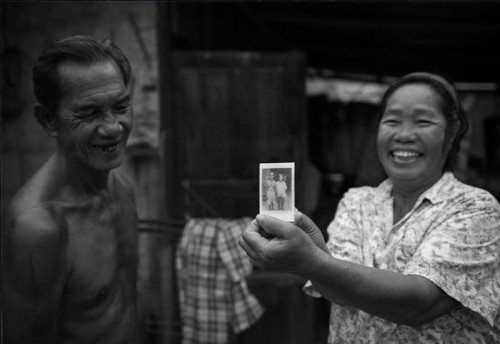
And last year I told you about another piece of photo equipment I love, the Fuji Instax 90. It’s an instant film camera, like a Polaroid, and I travel with it a lot.
I’ve found it’s a great way to make connections with people on-the-ground. I get to take their photos (like the one below), and in exchange, I can give them a photo of themselves. This is especially valuable to people in developing countries who rarely have access to cameras, much less printed photos.
As for lenses, I have a couple of favorites for my Nikon and my mirrorless Fuji.
For the Nikon, I love the 70-200 2.8. It’s a beast, but nothing beats it for sharp shots with shallow depth of field. My 24-70 2.8 lens is a great all-round travel shooter that allows me to shoot in dark situations and also get that shallow depth of field that I love.
The Fuji XT2 has a fantastic kit lens! It’s an 18-55 lens, which is the equivalent of about a 24-70 on my other camera. It’s sharp, and I love the range for travel shots.
When you’re choosing a lens, it can feel like there’s an endless selection out there. Two of the biggest decisions that will help you narrow it down are:
1. What focal length do you want?
Focal length will determine how your lens sees the world. If you choose a wide focal length (10mm-35mm), you’ll take in an expansive view.
If you choose a telephoto focal length (100mm-500mm), you’ll take in a narrower field of view, but far off elements will be magnified in your frame.
Or, choose something in between (around 50mm) and you’ll get a “normal” perspective similar to the human eye.
2. What aperture do you need?
Every lens has a different maximum aperture. Generally speaking, more expensive lenses tend to have apertures that can open wider (f/2.8 is a wide aperture… so a lens that will open to 2.8 lets in lots of light). When a lens can let in more light… it helps you have a faster shutter speed and overall sharper images.
Your lenses typically match the brand name of your camera, so if you’re shooting with a Nikon, you need a Nikon lens, and if you’re shooting with Canon, you need a Canon lens. But different manufacturers make different brand lenses, so you need to shop around. Olympus, for example, can take Panasonic and Leica lenses. And Sony cameras have adapters to mount other lenses, too.
I’ve found a big difference in image quality when I buy bigger, more expensive lenses, so sometimes cheaper is worth it… and other times cheaper is just cheap.
For me, if I’m looking for something on the cheaper scale of things but still a nice quality, I like these little pancake lenses…
Canon has one here.
And the Nikon lens here.
They’re around $100 – $200; they have a very wide aperture of f1.8, so you get a nice blurred background; and they don’t have a lot of glass or moving parts because they don’t zoom, so they’re cheaper to manufacture and thereby cheaper for you to buy.
Lori says she shoots with her 25mm, f1.4 nearly 95% of the time… making it impossible to zoom, but it’s still the lens she reaches for most.
Camera straps
Comfort is important when you’re out shooting. That’s why I really like my BlackRapid “R Strap”—a strap that keeps my camera slung over my shoulder and across my body, instead of around my neck.
And both Daniel and Kristen shoot with these hip holsters.
Travel Photography Resources
5 Dos and 2 Don’ts for Travel Photography
Take Great Photos And Get Paid More For Your Travel Articles
Turning a Photography Hobby into a Monthly Income
The Pros Of Selling Your Images As Stock Photography
16 Mobile Photography Tips And Tricks Every Photographer Should Know


