Bonnie here, again, with your last on-the-ground report from our small-group stock photo workshop with Lise Gagne and Shelly Perry in Maui, Hawaii. It’s our last day here and we’re all so relaxed on “Maui time” that no one wants to go home. Of course, we’ve got plenty of photos to help us remember our trip — and hopefully make a nice stock photo income when we get home, too. One really simple trick we’ve learned is how to use reflectors to take more saleable photos outside in the bright, tropical sun. A reflector will pop more light onto your subject when you’re shooting in the shade… or fill in the harsh shadows on a person’s face when you’re shooting in the bright sun. Reflectors are inexpensive, easy to use, easy to pack, and, with different colored surfaces, you can create a variety of stunning looks for your model. We’ve used them in nearly all of our shoots here in Maui. Here we are, using one on the beach:  To give you an idea of what reflector light looks like, here are a few of the shots we took while using a reflector during our mermaid and yoga shoots here in Maui. In each of these, the reflector light is coming in opposite the sunlight:
 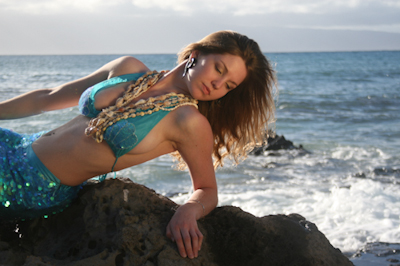 Angie D’Amico
 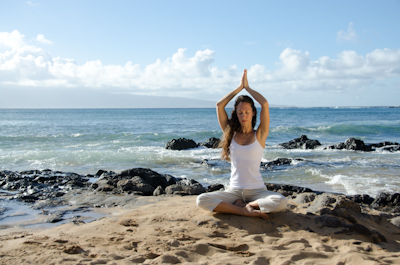 Bonnie Caton
 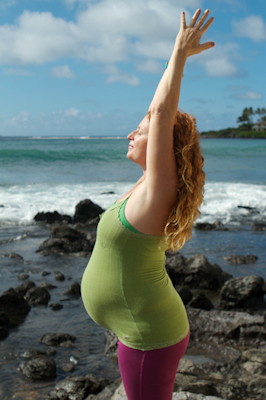 Kim Wilson
 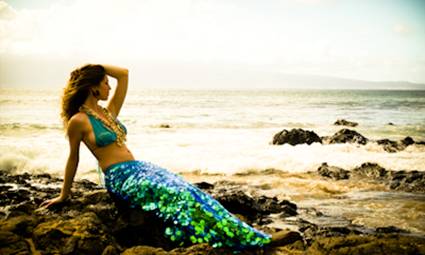 Cheryl Michaels
 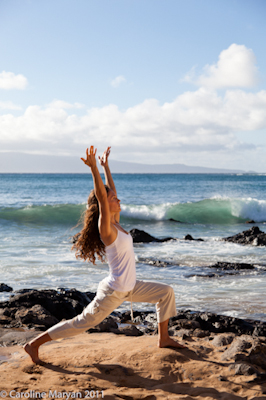 Caroline Maryan Here are some basic guidelines for using a reflector that I picked up during the workshop: ** Watch for the light. When you’re using a reflector, try to catch reflection from the sun or other light source and aim it at your subject. You can watch the light move onto and away from your subject’s face. You can also ask your subject if he or she sees the light. If they do, then you’re on the right track. ** Watch your subject’s eyes. Reflectors can be too bright. If you see your subject squinting, then move the reflector back to soften the light. ** Try different colors. Many reflectors have a silver, gold, and/or white side that you can use to get different effects. Some peoples’ skin looks better with a gold surface than a silver one, and vice-versa. Try out different sides of the reflector to see what kind of light you’re getting. Another great thing about using a reflector is that it’s silent, easy to maneuver, and won’t disturb anyone with a bright flash. People go to luxury places like Maui to relax. There’s an understood air of tranquility. Often times, you don’t want to get out your flash or tripod and disturb the peace, and with a reflector, you won’t have to. Try it out next time you go somewhere luxurious… or even at the park near your home. [Editor’s Note: Learn more about how you can turn your pictures into cash in our free online newsletter The Right Way to Travel. Sign up here today and we’ll send you a new report, Selling Photos for Cash: A Quick-Start Guide, completely FREE.]
Travel Photography Resources
5 Dos and 2 Don’ts for Travel Photography
Take Great Photos And Get Paid More For Your Travel Articles
Turning a Photography Hobby into a Monthly Income
The Pros Of Selling Your Images As Stock Photography
16 Mobile Photography Tips And Tricks Every Photographer Should Know
