In photography, simple techniques and tweaks in your camera settings can create a big impact and make your images stand out. For example, we all know that opening up the aperture to the widest possible would produce a lovely bokeh effect that we all love (where the subject of your image is in sharp focus but other elements are blurred). But the opposite works well, too, in certain situations, especially when there are small bright sources of light in the image. By closing down the aperture to the smallest setting possible (highest f-stop number), you can achieve the “starburst” effect, evident as those twinkly little stars in the image below. 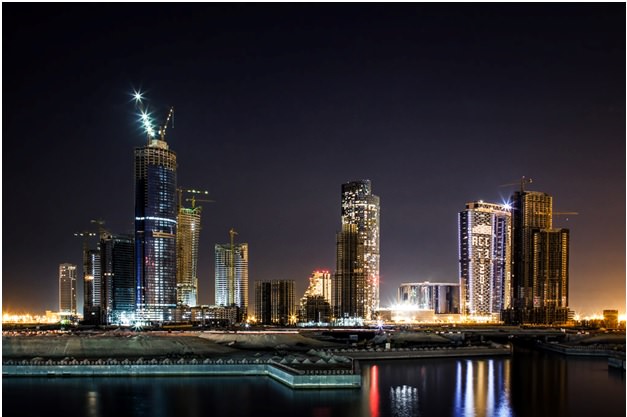 Here are a few tips to make it easier to achieve them: – Switch to Aperture Mode or Manual Mode and set your aperture to at least f/14 or higher (up to f/22). The smaller the aperture (higher f-stop number), the more pronounced the shape of the star will be.
 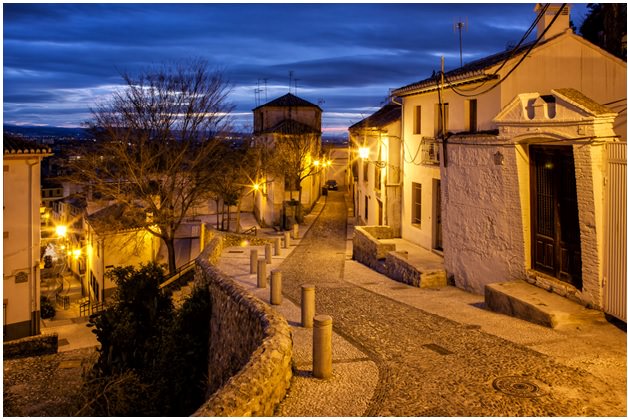 – This tip also works well with the sun. It’s much easier if it’s partially covered by something in the foreground, like tree branches or a mountain in the horizon. Just make sure to follow safety rules when shooting against the sun. If it’s too bright to look at it with your eyes then it’s likely too bright for your camera. Looking directly at the sun through your viewfinder or exposing your image sensor to intense sun for more than a fraction of a second will likely do damage to both you and the camera.
 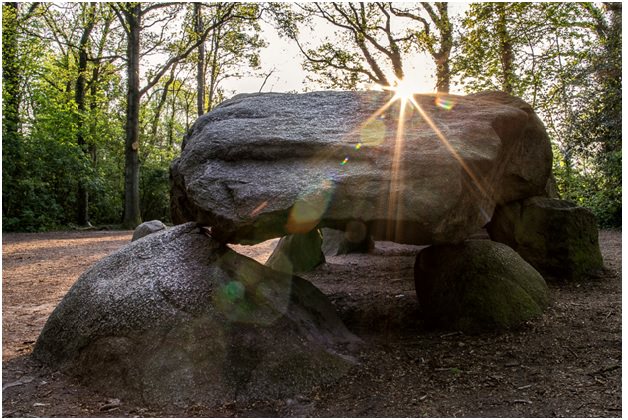 – The effect works much better if you shoot with a wide angle lens instead of a zoom lens. Don’t hesitate to use your wide angle and crop the image later to keep only the interesting parts.
 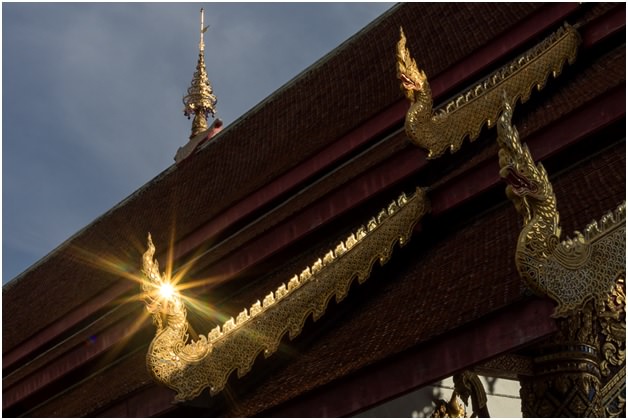 – Speaking of lenses, the number of branches on the starbursts also depend on the lens and how many aperture blades are inside. Try using different ones to see how the shape changes. – When shooting at night or indoors, use a tripod to stabilize your camera. Since the aperture is so small, the shutter speed will probably last a few seconds.
  So go ahead, experiment, and have fun with the light sources. Share on Facebook
Travel Photography Resources
5 Dos and 2 Don’ts for Travel Photography
Take Great Photos And Get Paid More For Your Travel Articles
Turning a Photography Hobby into a Monthly Income
The Pros Of Selling Your Images As Stock Photography
16 Mobile Photography Tips And Tricks Every Photographer Should Know
