Digital cameras make it easy to shoot more pictures than ever. During a recent trip to Australia, my wife Karen and I shot over 350 images of endangered sea lions in under an hour. We were in Australia for 48 days and shot nearly 9,600 images in total. Of those, I think we saved just a few over 2,000. So, how did I tame the beast? Well, for starters, I don’t even start to look at my photos without first backing them up onto a separate hard drive or CD. You should do the same. Once that’s done, my digital workflow process includes sorting and deleting everything I know I don’t want. Photos that are out of focus or improperly exposed… photos where someone stepped in front of my lens before I clicked the shutter… and anything else that isn’t visually pleasing. There is no hard-and-fast rule about how this should be done. Here’s what I do in Adobe Lightroom…
Lightroom Tip: Importing Your Photos
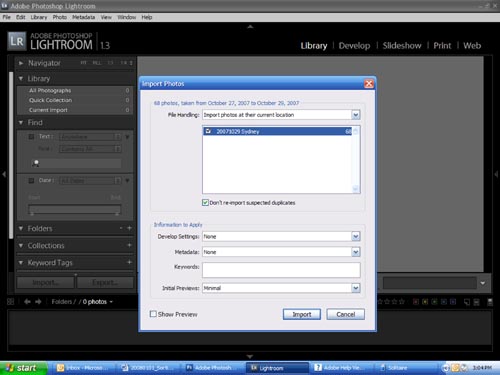
First, import your photos into Lightroom. You can do that by going up to “File” and selecting “Import photos at their current location.” Here, you can add text data, like your copyright information and/or keywords. You can add or… change this text later in batches (that’s part of the beauty of working in Lightroom instead of in Photoshop). But if you want your copyright information and/or keywords on everything you import, you might as well put it in at the start.
Lightroom Tip: Picture Selection
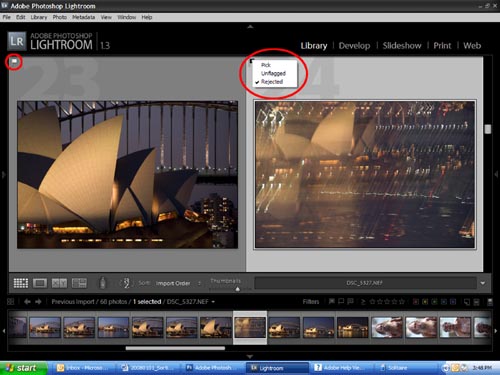
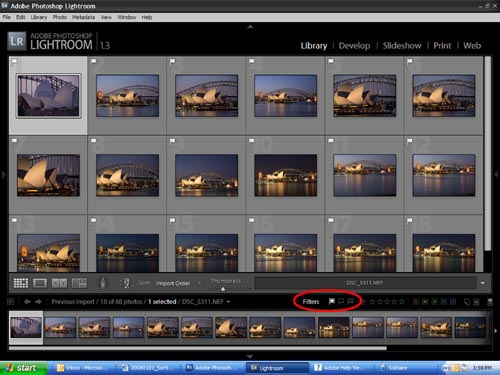
Now you can begin the process of selecting which pictures to keep and which to delete. Set your viewing software so you can view the details of your images, one or two at a time. In Lightroom, you can use the “grid” or “loupe” views for this purpose. 
Lightroom Tip: Deleting Unwanted Photos
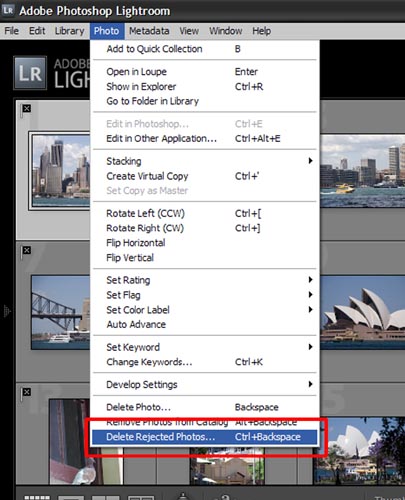
** Delete Rejected Images — Now that you have determined which images to delete, Lightroom provides you with a batch deletion option. Open the pull down list under “Photo” on the tool bar and click on “Delete Rejected Photos… ” Lightroom will lead you through the deletion process. 
Travel Photography Resources
5 Dos and 2 Don’ts for Travel Photography
Take Great Photos And Get Paid More For Your Travel Articles
Turning a Photography Hobby into a Monthly Income
The Pros Of Selling Your Images As Stock Photography
16 Mobile Photography Tips And Tricks Every Photographer Should Know


