Editing a photo might seem overwhelming, especially after coming back from a trip – there are often thousands of images to go through.
But with the help of software like Lightroom, and following through a few easy steps, you can make it easier to browse your photos and pick the ones that need editing.
Here’s the process I follow for editing photos:
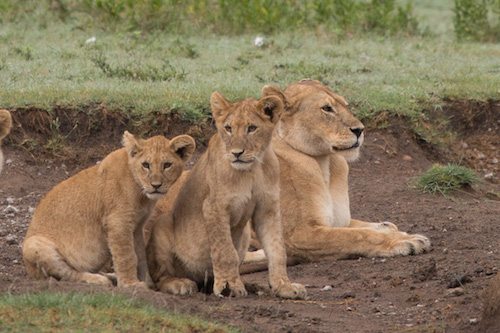
First, ensure that your photo is technically correct. Start with a shot that is not blurry, overexposed or underexposed. Zoom in and look at the image closely as you need a strong foundation to build upon.
Example: Both images of these lions look similar when zoomed out, but the first one is slightly blurry when zoomed in.
1. Make sure the photo is compositionally correct and enhances the story
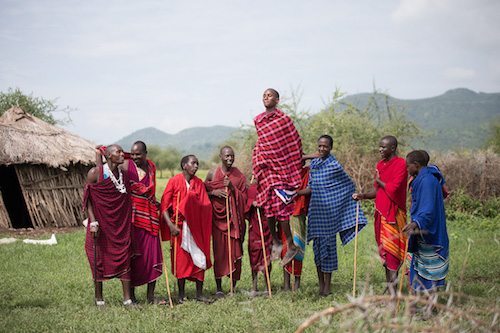
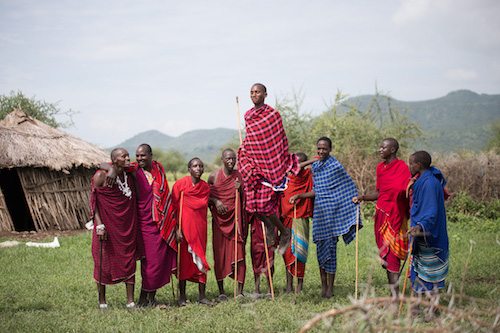
The photo you pick needs to complement the story you want to tell. Pay close attention to the composition. Ask yourself if all the elements of the image contribute to the story or if they’re just cluttering the image.
Example: Even though both photos of the Maasai look identical, on the second image one of them has his arm around his friend, and that enhances the camaraderie between them.
2. Start with basic adjustments to your photo
Once you’ve chosen a photo, make some basic adjustments to build upon later. You want to make sure the exposure is correct; adjust the contrast, highlights, and shadows; and saturate the colors a bit to make them pop.
3. Apply your style
This is my favorite part. With the photo now properly adjusted, you can start applying your style to it. We all have different styles, and it usually comes out with time and practice – and that’s what people will look for when buying your images. I personally like to add warmer tones to my shots, enhancing the lighting to make it more dramatic, using split toning (the process of adding different colors to the shadows and the highlights of an image) to add subtle colors to the shadows, and playing with vignetting (softening or shading away the edges of the subject) to place the focus on my subject.
4. Come back later with fresh eyes
This step sounds counter-intuitive, but it’s a crucial step. After having spent a lot of time in front of a screen, we tend to go overboard with the processing. Taking a break and coming back with fresh eyes will allow you to pick up the small editing mistakes and tone down or increase some of the adjustments.
Travel Photography Resources
5 Dos and 2 Don’ts for Travel Photography
Take Great Photos And Get Paid More For Your Travel Articles
Turning a Photography Hobby into a Monthly Income
The Pros Of Selling Your Images As Stock Photography
16 Mobile Photography Tips And Tricks Every Photographer Should Know


