Last week I said that if you’re thinking about shooting and selling your photos to stock agencies, your photos have to be clean. And by that I mean logo-free, trademark-free, even three-stripe Adidas free. (If you missed last week’s article, you’ll find it here: Shoot Clean).
This week, let’s talk about how you remove those logos from your photos — using Photoshop. Take this photo, for instance, submitted for this month’s photo challenge…
What’s great about this picture is that it has a nice composition and it’s cute. If this participant wants to sell this photo as stock, though, SpongeBob has to go.
Here’s how I’d do it…
(As with all things Photoshop, there are a number of ways to get rid of SpongeBob. In fact, even the way I’m about to show you combines a few different techniques… )
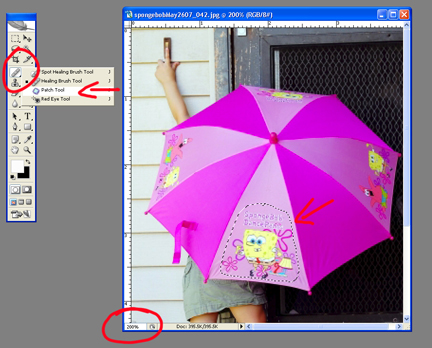
To start, I am going to use what’s called a “patch.” To find the patch tool, you must first find the tool on the left toolbar that looks like a Band-Aid. (It’s usually the fourth one down on the left. I’ve circled it on the screen shot below.)
Behind that tool is the patch tool. To get to it, right-click and chose it from the drop down menu.
With that tool selected, you can then click and hold and make a circle around that front SpongeBob (see the picture below). Try not to draw your circle outside the umbrella and try not to clip any part of SpongeBob with your circle. Increase the size of the picture if you’re having trouble getting in tight enough (see the second red circle on this next shot, where I increased the size from 100% to 200%).
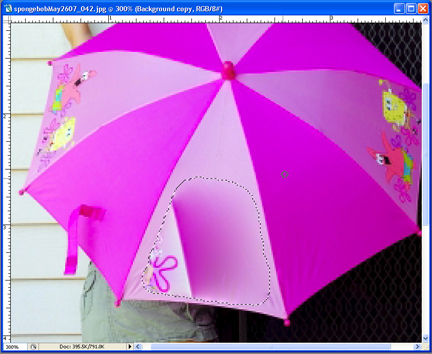
Once you’ve circled SpongeBob, drag him to the right, into the next umbrella panel. You do this by clicking and holding your mouse and dragging him as far into the next panel as he’ll go — without going over the crease into the third panel.
Don’t worry that this new panel is a different color or that SpongeBob doesn’t fit into this next panel. The patch tool is looking for texture and not color, and you can always repeat this step when something doesn’t fit.
Once you’ve pulled Bob into that next panel over, let go of him. If Bob were smaller, we’d likely be done now, but since the circled SpongeBob is bigger than the right-hand umbrella panel, we need to repeat the process.
Here’s what my picture looked like when I pulled Bob over the first time…
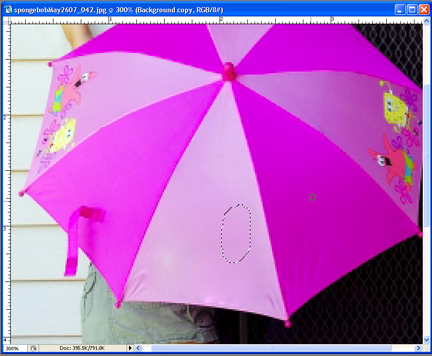
Each time I pull him over to the side, I’ll draw my circle a little smaller until, eventually, all the dark pink is gone and I’m left with a clear panel; I have removed the logo from the photo.
This patch tool is great for things like this, where you have a lot of similar textures to work with. Just watch out for edges and creases as that’s where you get into trouble — when the textures start to change.
Repeat this process for all the remaining SpongeBob panels on the umbrella and double-check for spots you can’t reach with the patch tool.
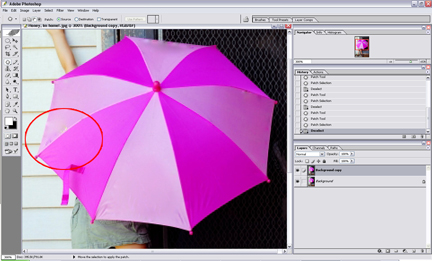
Once all the panels are clear and you have successfully removed all the logos from the photos, you need to use the clone stamp tool to make sure your colors match. You’ll find this tool on the toolbar just below the patch tool (5th icon down on the left). It looks like an address stamp.
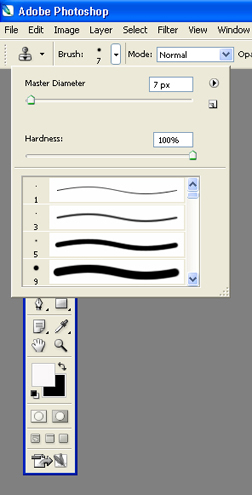
When you click on this tool, you’ll likely need to adjust your brush size. For this, I’ll use a size seven. You can change your brush stroke size at the top of your screen by clicking the little upside down triangle next to the brush number here…
Unlike the patch tool, the aptly named clone stamp will clone both texture and color, so you need to be careful. You have to pick an area you want to clone that matches exactly.
Once you’ve found a spot you can clone, move your mouse over it and press the ALT key on your keyboard. This will select that spot as your stamp.
Once you have a stamp, go to the area you want to cover and click on it. You’ll see that an exact clone of the space you marked with the ALT key will show up wherever you click.
Go around the rest of the umbrella this way cleaning up anything that’s remaining. Keep in mind you may have to adjust your brush size throughout this process — I do so often as I work to get into those tight corners and odd spaces.
Here’s my final picture…
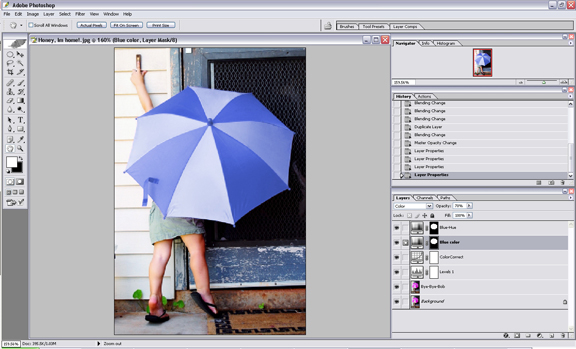
Remember, though, that I also adjust my “Curves” and “Levels” with every shot I submit to sell for stock — and I suggest you do the same.
To finish this photograph, I nudge the mid tones a little (the middle slider) just slightly to the left… toss in a curves layer… and decide to warm it up just a little.
If you don’t remember how to do this, go back to our last Photoshop tip on adjusting the blue cow HERE.
And then maybe, just for fun, I might change the color of the umbrella…
But that’s a tip for another week.
[Editor’s Note: Learn more about how you can fund your travels and make an extra income with photography, travel writing, blogging, and more in our free online newsletter The Right Way to Travel. Sign up here today and we’ll send you a new report, Five Fun Ways To Get Paid To Travel: A Quick-Start Guide, completely FREE.]
Travel Photography Resources
5 Dos and 2 Don’ts for Travel Photography
Take Great Photos And Get Paid More For Your Travel Articles
Turning a Photography Hobby into a Monthly Income
The Pros Of Selling Your Images As Stock Photography
16 Mobile Photography Tips And Tricks Every Photographer Should Know


