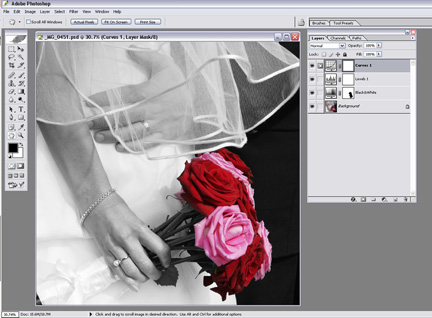
July’s first-place photo challenge winner submitted a beautiful image with selective (or some say “spot”) coloring. You can see it here… This technique used to be called “hand coloring” because it was literally done by hand on the print with photo oils (kind of like a paint or dye). For years, I created images this way — and though I enjoyed it, it was incredibly labor-intensive. These days, things are a lot easier. Today, you can achieve similar results with just a few steps, using layering in Photoshop. Keep in mind that there are numerous ways to do just about anything in Photoshop. I’m just giving you one way. The more time you spend in Photoshop, the more comfortable you will feel with its functions. And eventually, you will find your own favorite features and ways of processing photos. So lets get started…
Photoshop Tip: Layering
I chose an image I shot at Lori’s wedding in Paris last May… here is the image just opened up in Photoshop and cropped to a square. I’m going to turn it into a black-and-white photo and then put spot color back on the flowers. 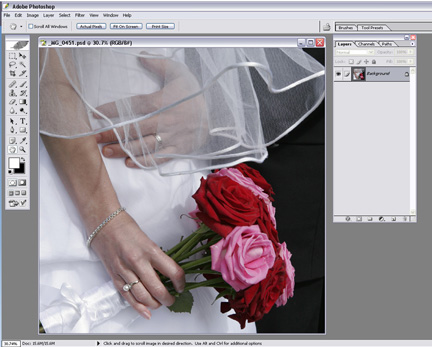
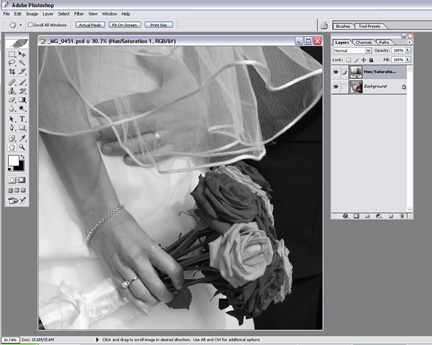
Photoshop Tip: Masking
An easy way to do this is to simply mask out the black-and-white layer where the flowers are. To do that, simply hit that little button on the bottom of the pallet (second one from the left) that looks like a camera or washing machine. That’s the button for creating a mask. Then use a paint brush and paint black on the mask where the flowers are. A good little phrase to remember in Photoshop is “White reveals and black conceals.” So, again, we’re going to spot color the flowers by painting black all over them. Remember, there are other ways to make a selection and speed up the process but painting is a good way to get started. See the mask next to the “Hue/Saturation” on the layers pallet? It’s that white box that looks like there is a little blob in it — that blob is the mask of the flowers. 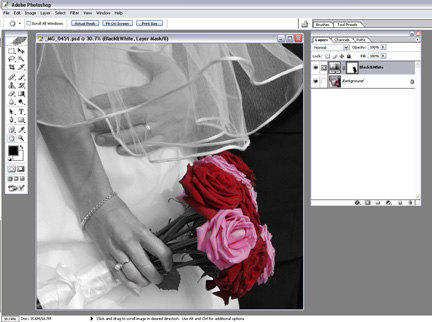
Photoshop Tip: Voila!
And voila … we went from this color image to a black and white image with an isolated spot of color. 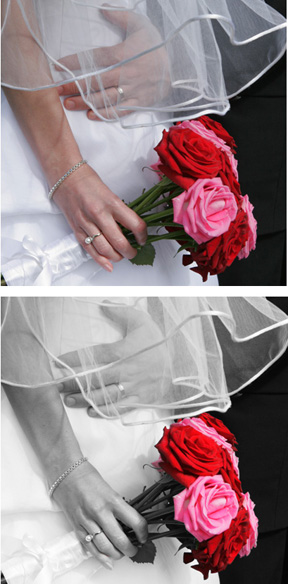
Travel Photography Resources
5 Dos and 2 Don’ts for Travel Photography
Take Great Photos And Get Paid More For Your Travel Articles
Turning a Photography Hobby into a Monthly Income
The Pros Of Selling Your Images As Stock Photography
16 Mobile Photography Tips And Tricks Every Photographer Should Know

