[et_pb_section bb_built=”1″][et_pb_row][et_pb_column type=”4_4″][et_pb_text]
Merry Christmas! Holiday Tip #6 is a fun photography trick I stole from our Turn Your Pictures into Cash Program. There’s an entire chapter in our program on cool, unique ways to create lens filters using everyday household items like pantyhose, cellophane, and shower curtains. And one of these is to create a center spot lens filter using Vaseline and an extra UV filter or plastic wrap. Here’s how it works: STEP #1: Buy a spare UV filter for your camera or try using a clear plastic you can stretch over your lens — like cellophane or plastic wrap. UV filters are the least messy option, as you don’t want any Vaseline to get on the actual lens of your camera and you can usually pick one up for about $5 in your local camera store. Make sure to take your camera with you to the store so you get the right sized UV filter, or at least take note of your camera model and lens before going. (Note: Under no circumstances should you let the Vaseline touch your lens. Use a spare UV filter or cellophane as a base for your Vaseline.) STEP #2: Secure your UV filter to your lens. Or secure the cellophane around your lens using a rubber band. STEP #3: Take a little Vaseline™ and rub it over your UV filter or cellophane, making sure it is evenly spread. Leave a clean area at the center of the filter by placing a coin or some other object in the middle and rubbing the Vaseline™ around the coin. This will leave the center clear and the outside edges blurry (essentially the same effect as a center spot filter). STEP #4: Take pictures. Experiment. Have Fun. Here are a few pictures Bonnie took to demonstrate… First, without the filter:  Now, with the Vaseline™ smeared on the cellophane:
 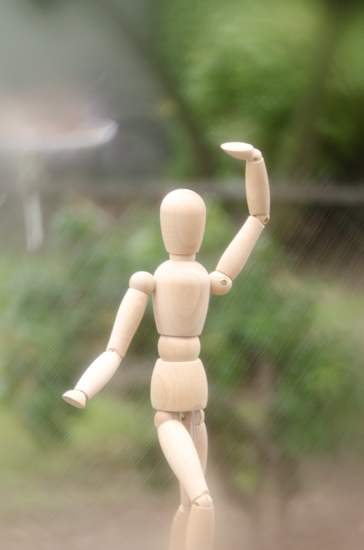 In this shot below, Bonnie spread the Vaseline™ on the cellophane leaving a straight vertical line, creating a “tilt-shift” effect.
  And again, in this photo, you can clearly see the line free from Vaseline.
  You can try this trick for portraits, still lifes, landscapes, you name it. Be creative, and have fun. — Lori Lori Allen Director, Great Escape Publishing [Editor’s Note: Learn more about how you can turn your pictures into cash in our free online newsletter The Right Way to Travel. Sign up here today and we’ll send you a new report, Selling Photos for Cash: A Quick-Start Guide, completely FREE.]
[/et_pb_text][/et_pb_column][/et_pb_row][/et_pb_section]
Travel Photography Resources
5 Dos and 2 Don’ts for Travel Photography
Take Great Photos And Get Paid More For Your Travel Articles
Turning a Photography Hobby into a Monthly Income
The Pros Of Selling Your Images As Stock Photography
16 Mobile Photography Tips And Tricks Every Photographer Should Know
