I was embarrassed by my results, and no amount of post-processing was going to save me. So, I took to Google and started watching instructional videos by professional commercial photographers on YouTube.
While watching, I noted the equipment they used and then searched for it on Amazon. It was all so expensive! I’m talking about $10k+ for a “proper” setup. There’s no way I could have afforded even one piece of that high-end gear. I felt inferior and started to doubt my ability to be successful at this.
Not quite ready to give up, I began researching less-expensive options. That’s when I discovered some DIY photography setups. This was definitely in my wheelhouse. Some of these guys were getting professional results using hardware store lights and old sheets. This gave me hope, and I felt a renewed sense of determination to get good at this.
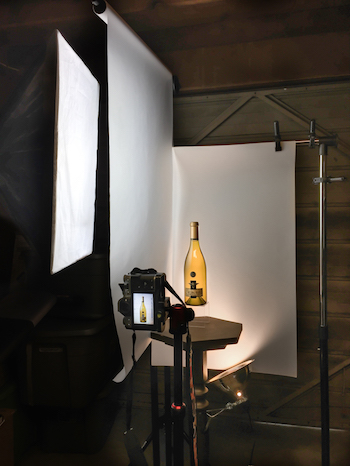
I bought a cheap kit light and set it up next to an old plant stand in my garage. The backdrop was a piece of poster paper clipped to a rolling garment rack. It wasn’t perfect, but it was a breakthrough.
A couple more tweaks––a sheet of velum to soften the brightness and a clamp light to bounce off the backdrop––and I finally got results I could be proud of.
My setup:
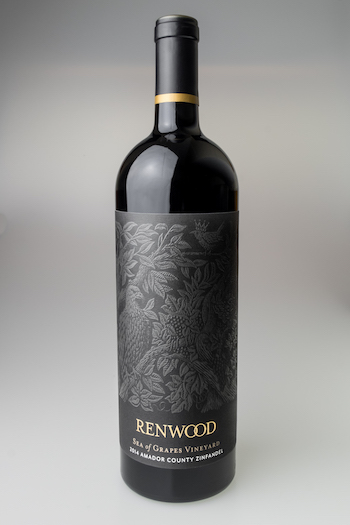
Here’s a photo from before I found this setup, and one after:
My first shoot using this setup was a full portfolio of 18 bottles, earning me $2,000 in one weekend. I originally had thought to put the money into some of that expensive equipment—but why?
The client was so happy with her images and had even recommended me to a neighboring winery. Why would I want to spend so much money to get what would likely be the same results? I’d rather allocate my hard-earned funds to amazing trips… and maybe some nice champagne.
Now, two years later, I still use this setup. I’ve learned a few more tricks of the trade, though, and have added, little by little, to my arsenal––but nothing has cost me more than $50 at a time. (Except, of course, for my shiny new Fuji H1 camera that I’d been eyeing for the past year.) I was finally able to afford it thanks to my fabulous side hustle. A side hustle that brought in over $10k last year!
Not only was I able to upgrade my camera, I’ve also booked a trip to Hawaii in the spring, as well as a long journey to multiple locations in Peru and Brazil at the end of the year.
Not bad for a DIY side hustle, right?
Travel Photography Resources
5 Dos and 2 Don’ts for Travel Photography
Take Great Photos And Get Paid More For Your Travel Articles
Turning a Photography Hobby into a Monthly Income
The Pros Of Selling Your Images As Stock Photography
16 Mobile Photography Tips And Tricks Every Photographer Should Know


